

Car Caddy: Front or Back Seat – FREE sewing pattern
ROOOOOAAAAADDDDD TRIIIIPPPPP! It’s the perfect time to load up your family and friends and hit the open road. But first, you have some ‘stuff’ you need to organize for the trip: tunes, cell phone, scribbled notes, tickets, pens, snacks, your wallet, etc., etc., etc.
If you skip this important organizational step, here’s what will happen: You are driving, keeping your eyes on the road (of course), and you reach out to grab something from the pile of stuff, but can’t quite reach it/find it without rear-ending the truck in front of you. Instead… the needed item falls off the seat, lodging somewhere between the seat and the door. Feel free to jump in here and repeat the words you shout in your car.
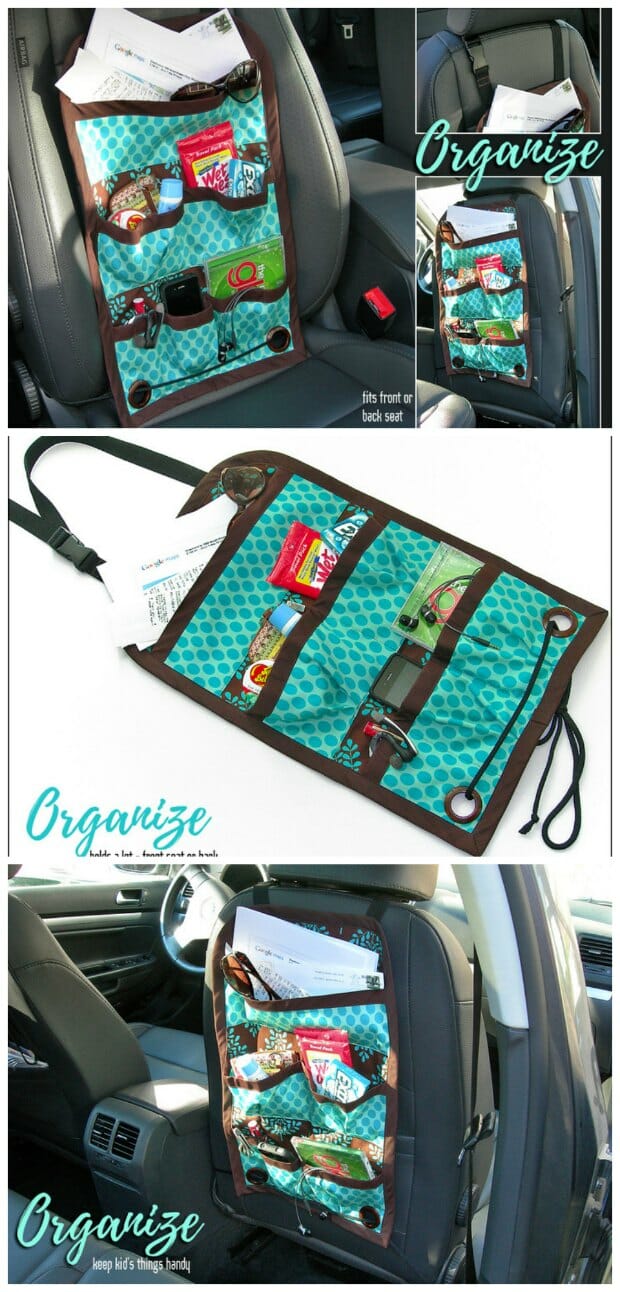
Our spiffy car caddy is designed to organize your stuff, improve your driving safety, and look cute as can be all at the same time. It straps around the seat’s headrest, so you can attach it to the front or the back. Hanging off the back, you can fill it up with little games and snacks to keep the kids occupied, cutting down the “Are we there yet??” requests to a minimum.
Or attach it to the front of the passenger seat to keep all of your supplies neat and tidy, and easily to hand for when you are busy and on the road. Now nothing slides off the seat onto the floor – saved!
Materials needed:
- ¾ yard of 44-45″ wide fabric for caddy front and back
- 1 yard of 44-45″ wide fabric for caddy pockets
- 1 yard of 20″+ wide lightweight fusible interfacing for caddy and pockets; we recommend Pellon Shape Flex
- 3½ yards (two packages) of ½” – 1″ wide bias binding for top pocket edges and entire outside edge of caddy body
- 1 yard of 1″ wide nylon webbing: we used black 1″ webbing
- One 1″ plastic toggle for strap connection: we used a Dritz quick release parachute buckle in black to match the nylon strap
- Two 1″ grommets for bottom corners of caddy: we used Dritz Home plastic snap-on grommets in Bronze
- 2 yards of ¼” – ⅜” nylon cording to tie through bottom corner grommets: we used a ¼” diameter paracord
- All purpose thread
- See-through ruler, quilting ruleror yardstick
- Fabric marker, pen, or tailor’s chalk
- Scissors or rotary cutter and mat
Find the pattern and full tutorial here
Downloading this free pattern? Great! You would make our day if you ‘bought us a coffee’ to help with the site running costs. Thank you.
